Getting Started
New here? This walks the whole thing start to finish — picking a plan, claiming your access, and getting the indicators onto your chart. Under 10 minutes end to end.
Choose Your Membership
Monthly, quarterly or yearly — all the same access
One membership covers the whole suite: the indicators, the Auto-Trader, the live trade room and the member site. The only difference between the plans is how often you are billed.
- 01.Open the membership page and pick monthly, quarterly or yearly
- 02.Read the terms when they come up and accept them
- 03.You are sent to Whop to check out
Check Out on Whop
This is where you give your TradingView username
Checkout is handled by Whop. One field on this screen matters more than the rest.
- 01.Enter your TradingView username when asked — this is what the indicators get granted to
- 02.Use the username shown on your TradingView profile, not your email address
- 03.Finish checkout — you are sent straight back to fsdxtrading.com
Create Your Site Account
One button. No licence key, no form to fill in.
Your site account gives you the member area — dashboard, journal, playbook, backtest sessions and Scout alerts. Whop already knows who you are, so there is nothing to type.
- 01.Checkout drops you on fsdxtrading.com/welcome automatically
- 02.Click Continue with Whop and approve when Whop asks
- 03.That's it — your account is created, your membership is attached, and you land on your dashboard

Claim Your TradingView Indicators
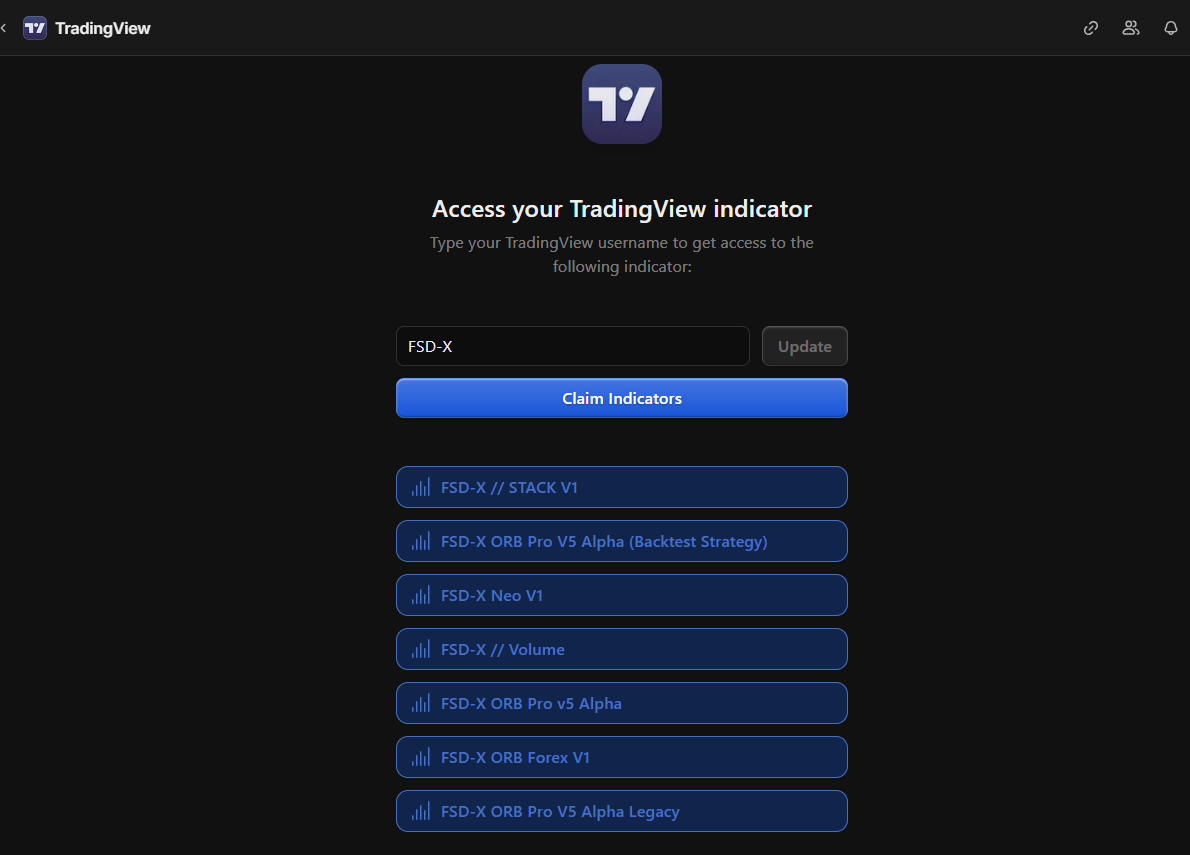
Invite-only scripts have to be claimed before they appear
The indicators are invite-only, so they need claiming on Whop before TradingView will show them to you.
- 01.Open your Whop membership
- 02.Click Claim next to the TradingView option
- 03.Confirm your TradingView username — the same one from checkout
- 04.Give it a few minutes to come through
Claim Your Discord Access
The live room, VIP channels and Scout alerts
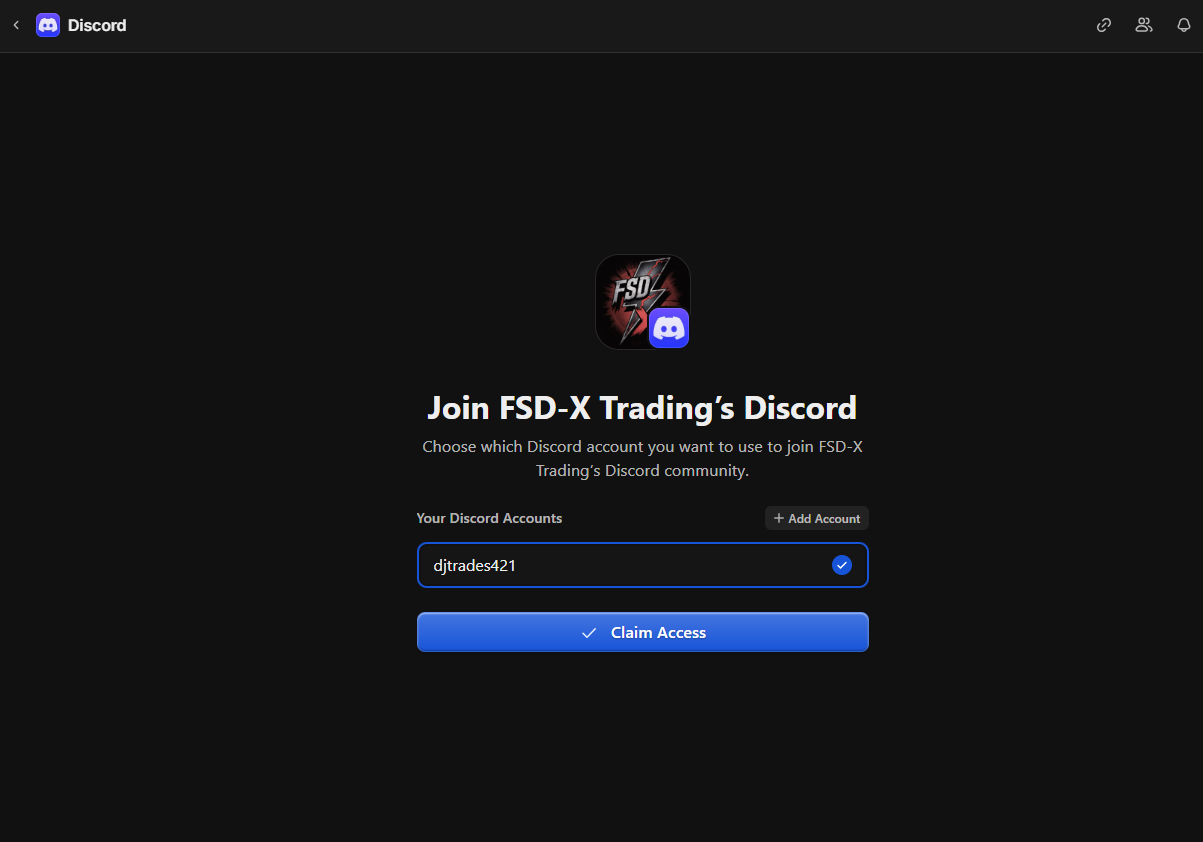
Discord access is claimed the same way, on the same membership page.
- 01.Back in your Whop membership, click Claim next to the Discord option
- 02.Authorize the connection when Discord prompts you
- 03.You are added to the private channels automatically
Add the Indicators to Your Chart
Claiming grants access — you still have to pull them onto a chart
Once claimed, the scripts sit in your TradingView library until you add them. This is the step people miss.
- 01.Open a chart on TradingView and click Indicators in the top toolbar
- 02.Go to Invite-only scripts in the left-hand list
- 03.Click FSD-X ORB PRO to add it to the chart
Activate Nexus 2.0
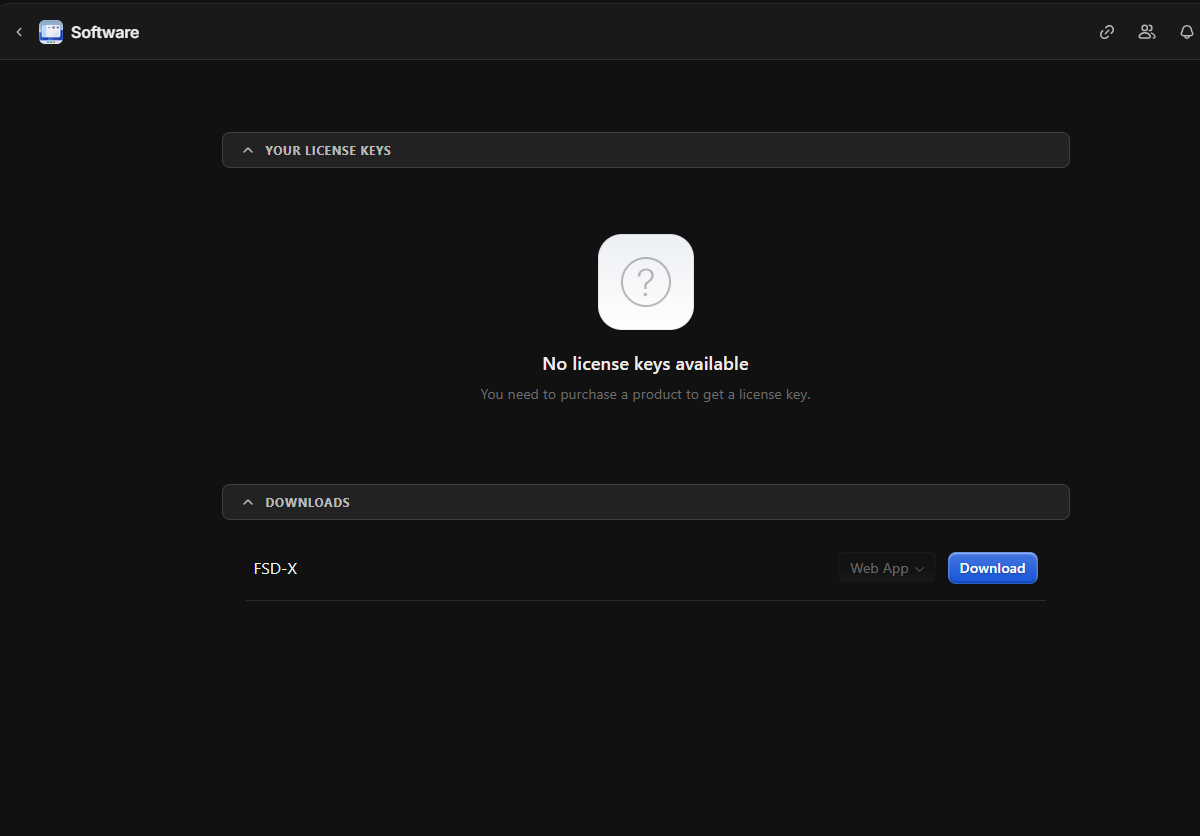
The one place your member key is still typed by hand
Nexus 2.0 is a Chrome extension that runs as a side panel inside TradingView.
- 01.In your Whop membership, open the Software tab and copy your licence key
- 02.Install FSD-X Nexus 2.0 from the Chrome Web Store →
- 03.Open TradingView and click the Nexus icon in your Chrome toolbar
- 04.Click KEY top right, paste the key and click Activate
Secure Your Account
Password, then lock it down — about a minute
Continue with Whop is there to get you set up, not to be your login forever. Give yourself a password and that becomes your everyday way in.
- 01.Open your profile and use Set a Password
- 02.Optional — turn Sign in with Whop off, so email and password is the only way into your account
- 03.Turn on two-factor with an authenticator app
You're All Set
Everything is connected — here's where to go next
Still stuck?
Open a ticket in Discord or send us an email — we'll walk you through it.
Not a member yet?
Step 1 above is where to start — pick whichever billing suits you and the rest of this guide takes it from there.
Cancel anytime in one click via Whop
Trading futures involves substantial risk of loss and is not suitable for every investor. Past performance is not necessarily indicative of future results.